iOS 原生代码的编译调试,都是通过一遍又一遍地编译重启 APP来进行的。所以项目代码量越大,编译时间就越长。虽然我们可以将部分代码先编译成二进制集成到工程里,来避免每次都全量编译来加快编译速度,但即使这样,每次编译都还是需要重启App,需要再走一遍调试流程。
幸运的是,John Holdsworth 开发了一个叫做 InjectionIII 的工具可以动态地将 Swift 或 Objective-C 的代码在已运行的程序中执行,以加快调试速度,同时保证程序不用重启。
InjectionIII下载使用
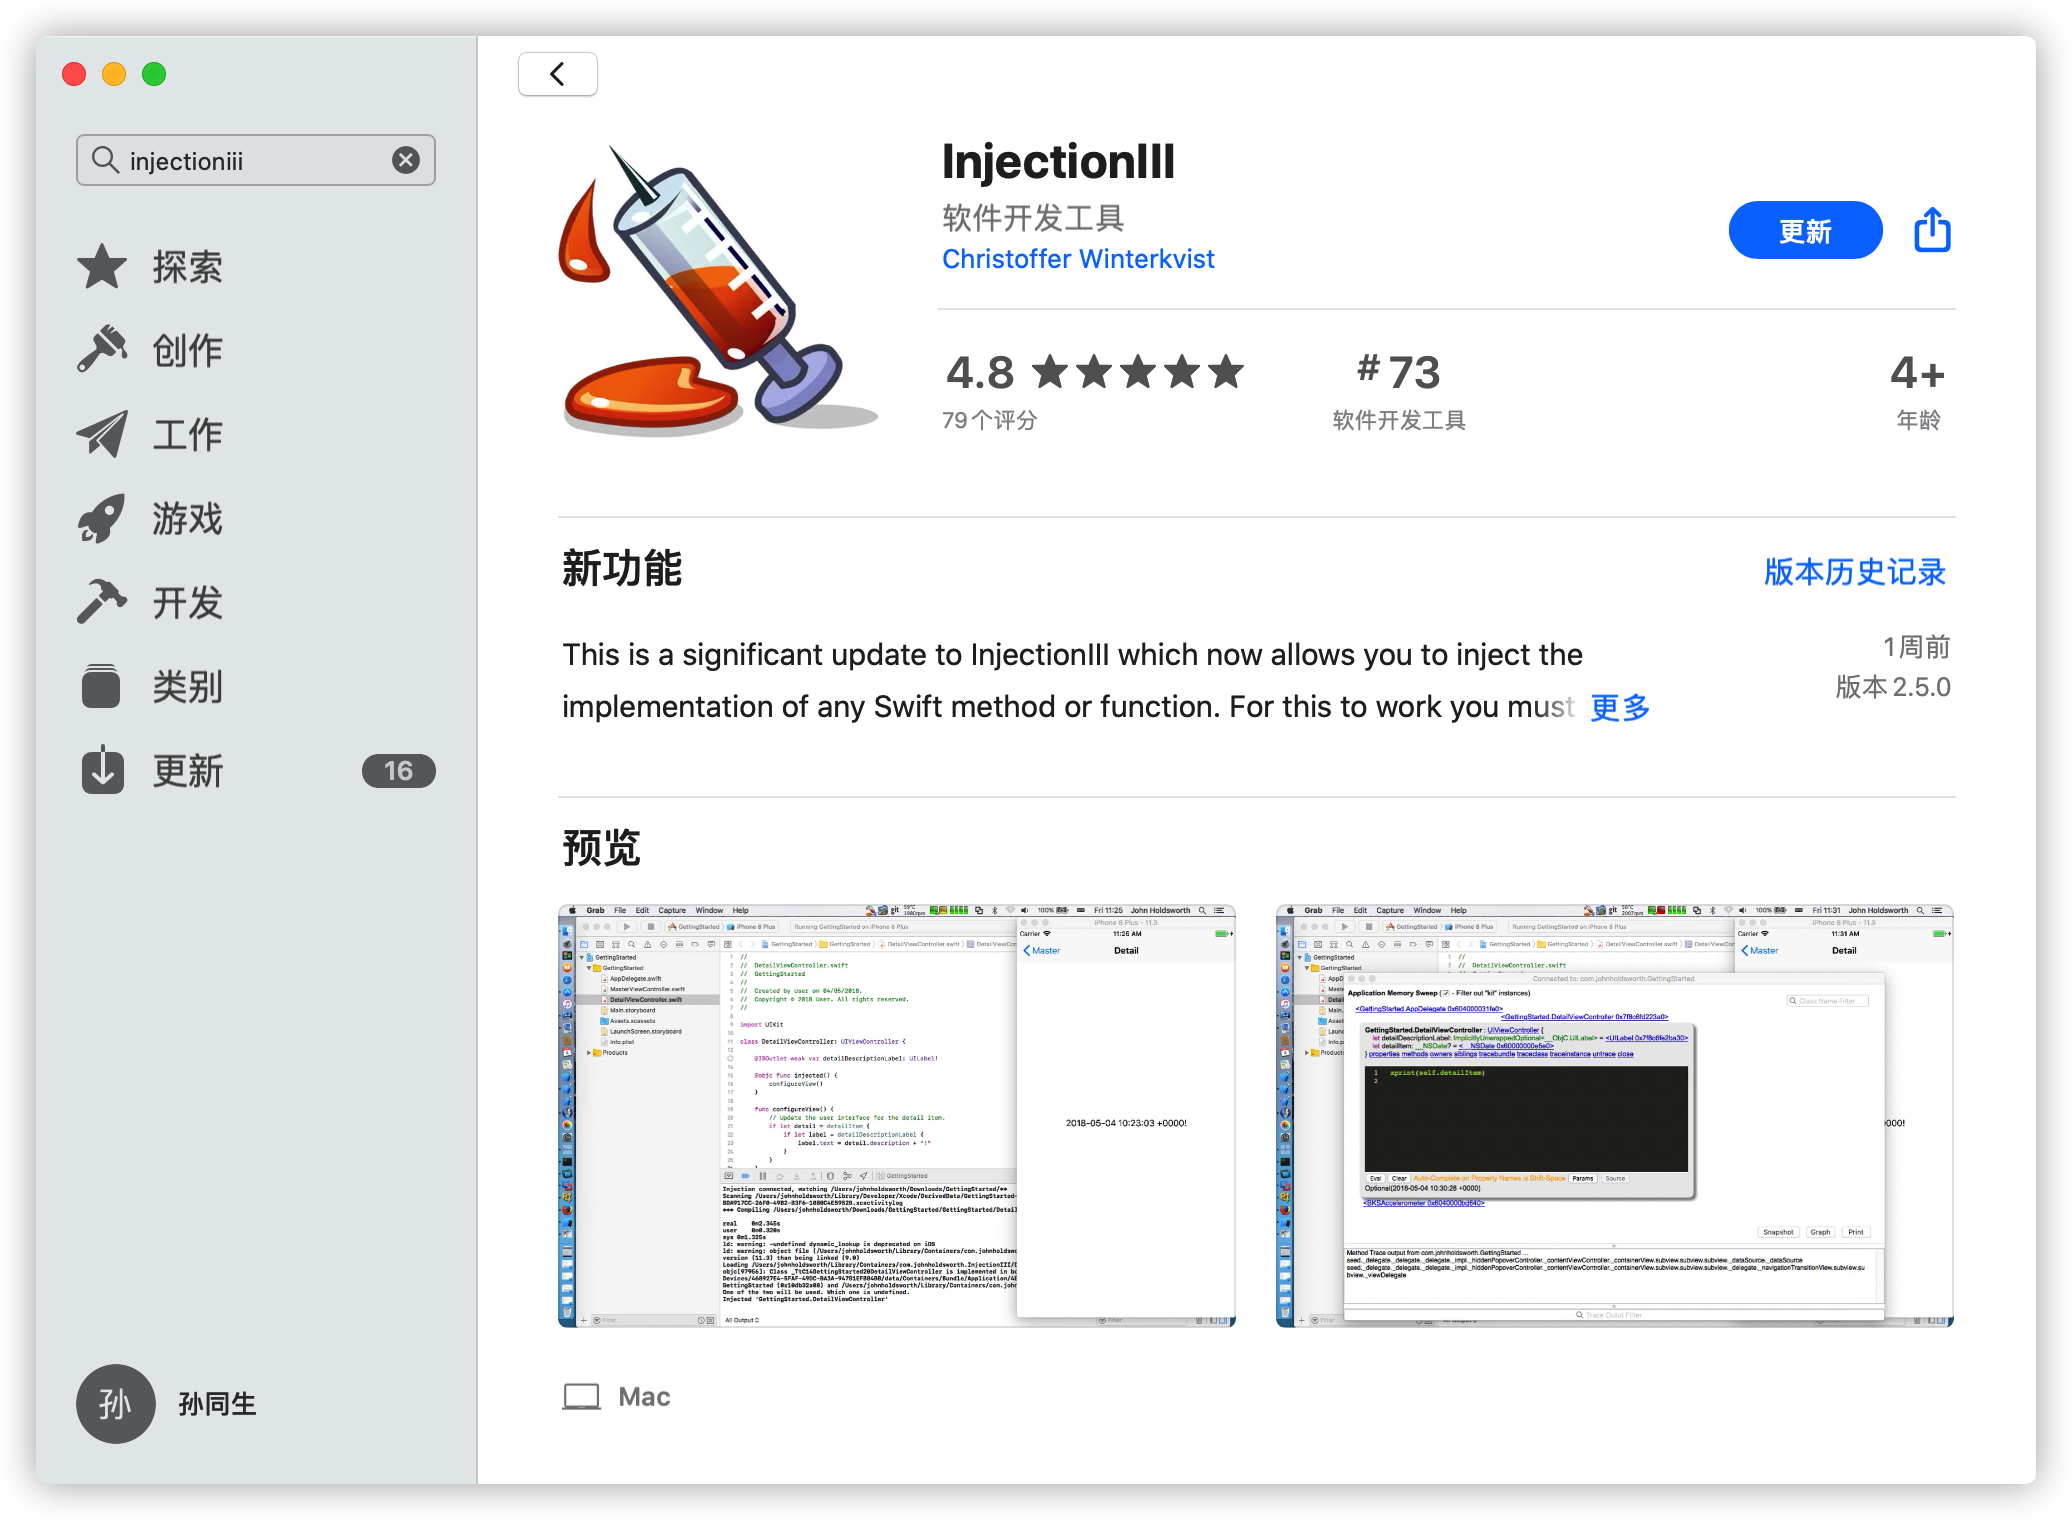
下载InjectionIII
如果仅用于使用的话在mac appStore下载就可以了:
在项目中添加代码
在 - (BOOL)application:(UIApplication *)application willFinishLaunchingWithOptions:(NSDictionary *)launchOptions 方法里添加如下代码
1 | - (BOOL)application:(UIApplication *)application didFinishLaunchingWithOptions:(NSDictionary *)launchOptions { |
1 | //成功时控制台会打印: |
运行InjectionIII 并选择项目目录
使用的时候会让你选择项目目录,InjectionIII 就是监控的这个目录,里面文件变动会有通知。
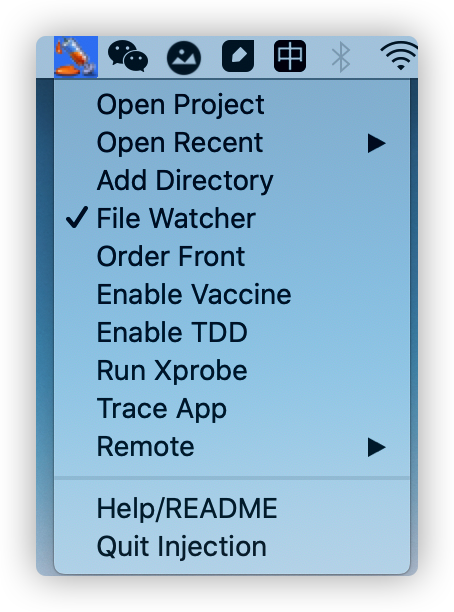
使用InjectionIII 并测试几种场景:
你可以在在对应的VC控制器中实现 - (void)injected 编写代码,写完后,command+s 保存切执行代码,Injjection就开始编译修改过的文件为动态库,然后我们在Injected方法内做UI reload工作,即可重绘UI。
也可以直接修改你想测试的VC代码,然后退出重进即可重载VC。
测试一下四种场景:
- 修改方法
- 新增方法
- 新增属性
- 新增类
其中 修改方法/新增方法/新增类 都可以动态修改
而当动态添加属性时则会报错
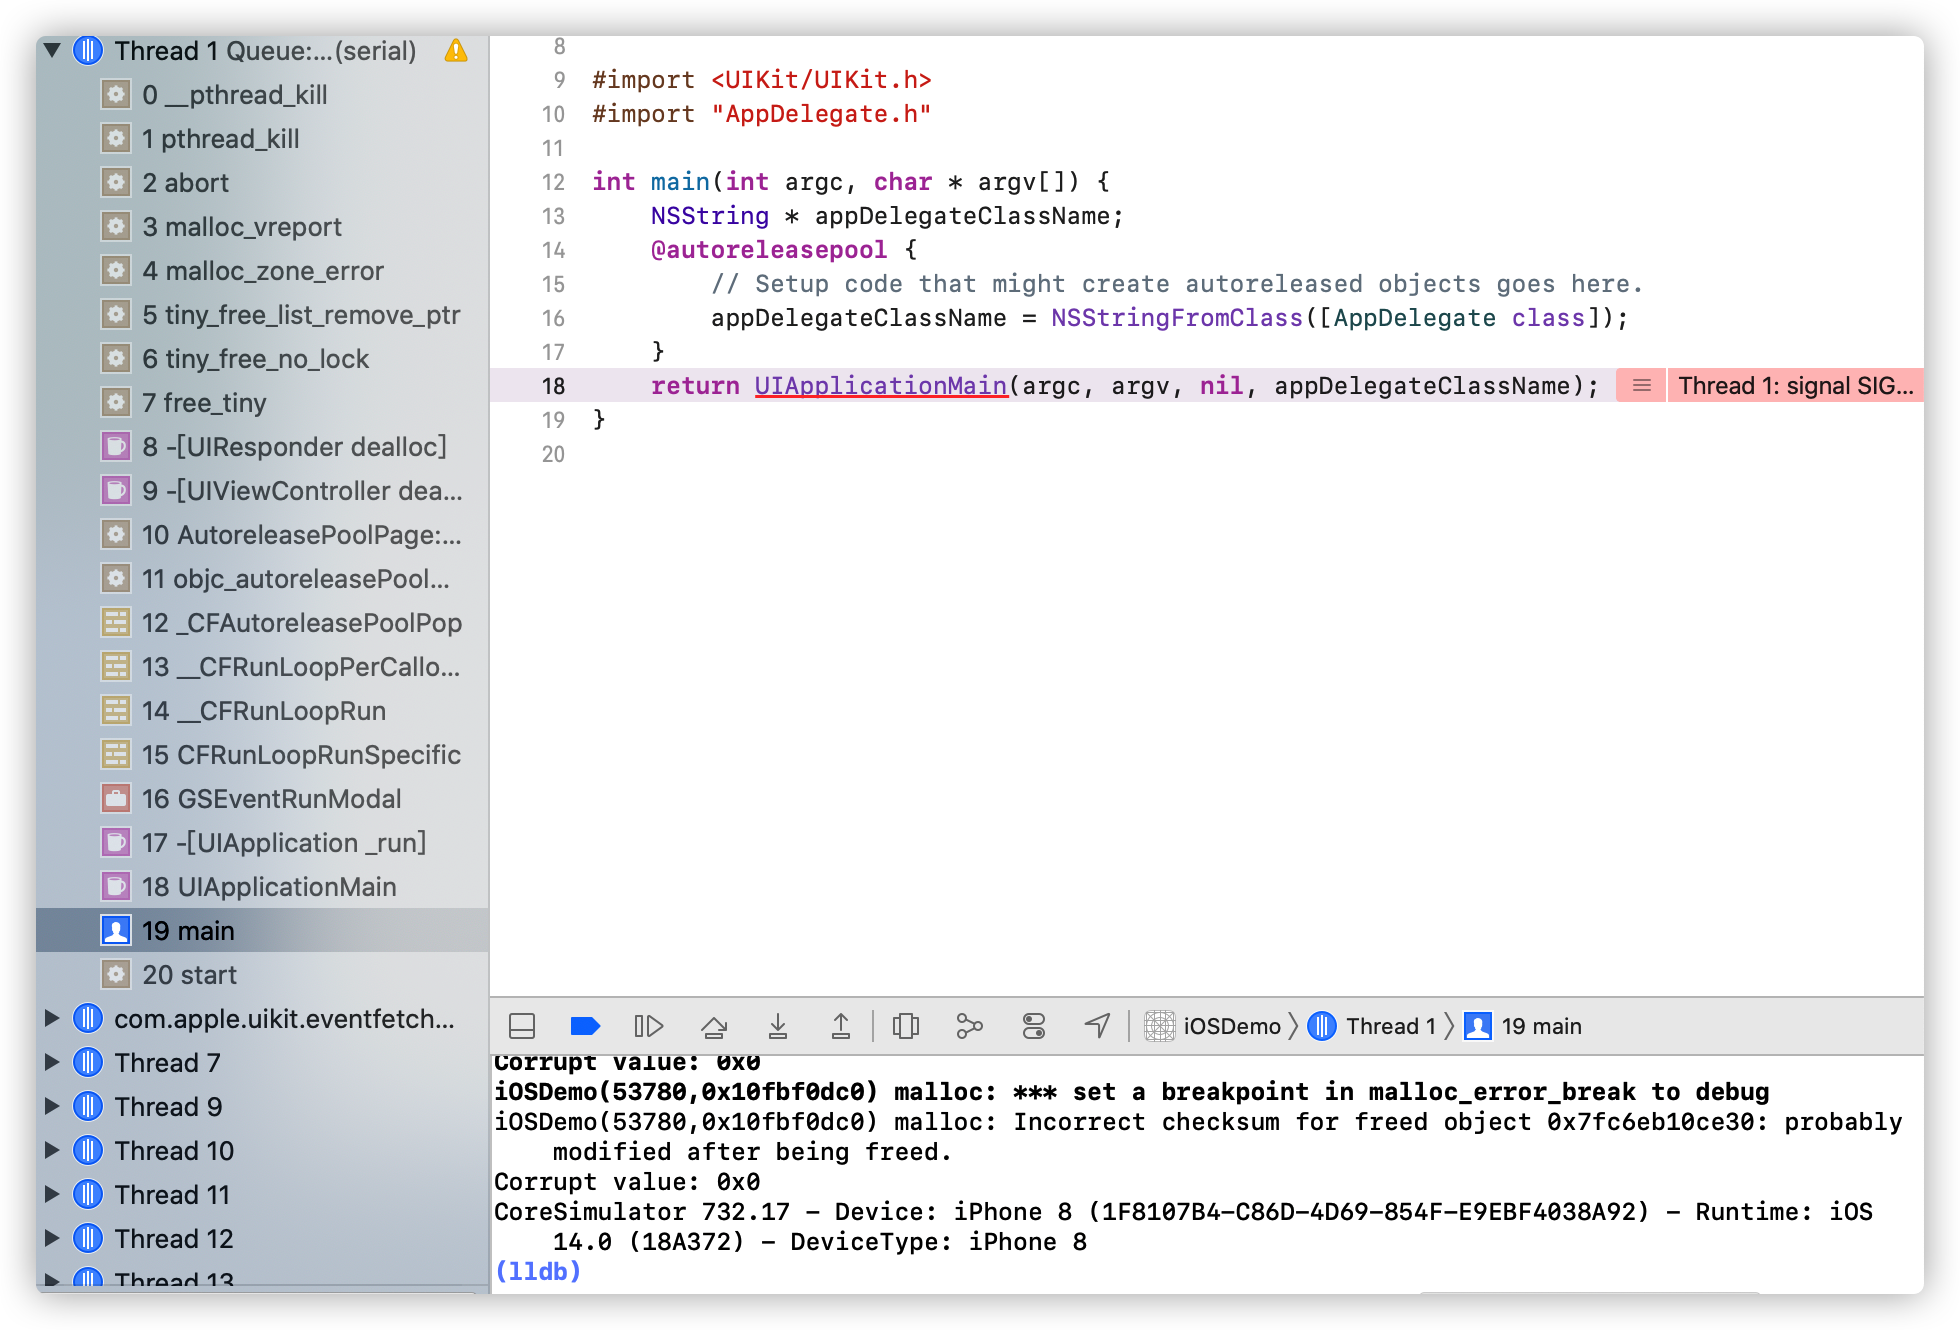
我们很自然的想到因为不能向已有类动态添加属性,但是InjectionIII到底做了什么呢?让我们带着疑问来看看InjectionIII的原理
没有看到效果的问题?
- 确认 Injection 监听的目录和 Xcode 项目目录是否一致。
- 再看下有没有保存成功,也就是针筒的颜色由绿色变成红色。
- 确认上面那句话有没有打印,也就是说有没有真的运行这个工具。
- 如果修改的是 cell / item 上面的内容,需要上下滚动才能看到效果。
- 如果修改的是一个普通页面的内容,最好是退出这个页面,再进入这个页面。
- 确认 Xcode 的版本和启动时添加的代码是否匹配,Xcode10 需要 iOSInjection10.bundle 才能生效
InjectionIII原理
大致流程梳理
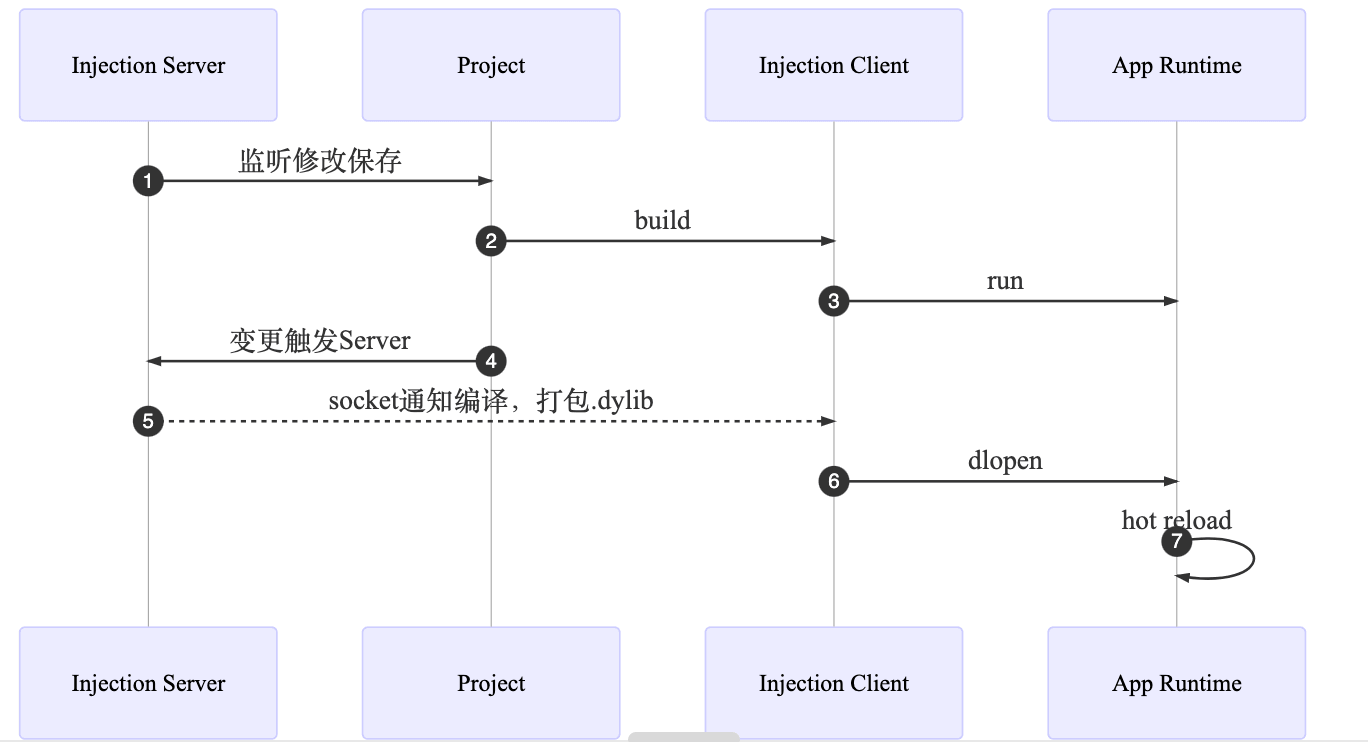
- InjectionIII 分为server 和 client部分,
- client部分在你的项目启动的时候会作为 bundle load 进去,server部分在Mac App那边,server 和 client 都会在后台发送和监听 Socket 消息,实现逻辑分别在 InjectionServer.mm 和 InjectionClient.mm 里的 runInBackground 方法里面。
- InjectionIII 会监听源代码文件的变化,如果文件被改动了,server 就会通过 Socket 通知 client 进行 rebuildClass 重新对该文件进行编译,打包成动态库,也就是 .dylib 文件。
- 然后通过 dlopen 把动态库文件载入运行的 App 里,接下来 dlsym 会得到动态库的符号地址,然后就可以处理类的替换工作。
- 当类的方法被替换后,我们就可以开始重新绘制界面了。整个过程无需重新编译和重载 App,使用动态库方式极速调试的目的就达成了。
这里有一点需要说明一下,模拟器下iOS可加载Mac任意文件,而真机设备如果加载动态库,只能加载App.content目录下的,换句话说,这个工具只支持模拟器。
编译InjectionIII工程
要了解一个工具,最好的方式当然直接看源码了。InjectionIII 的源代码链接如下:https://github.com/johnno1962/InjectionIII,可以下载下来对着源码分析。
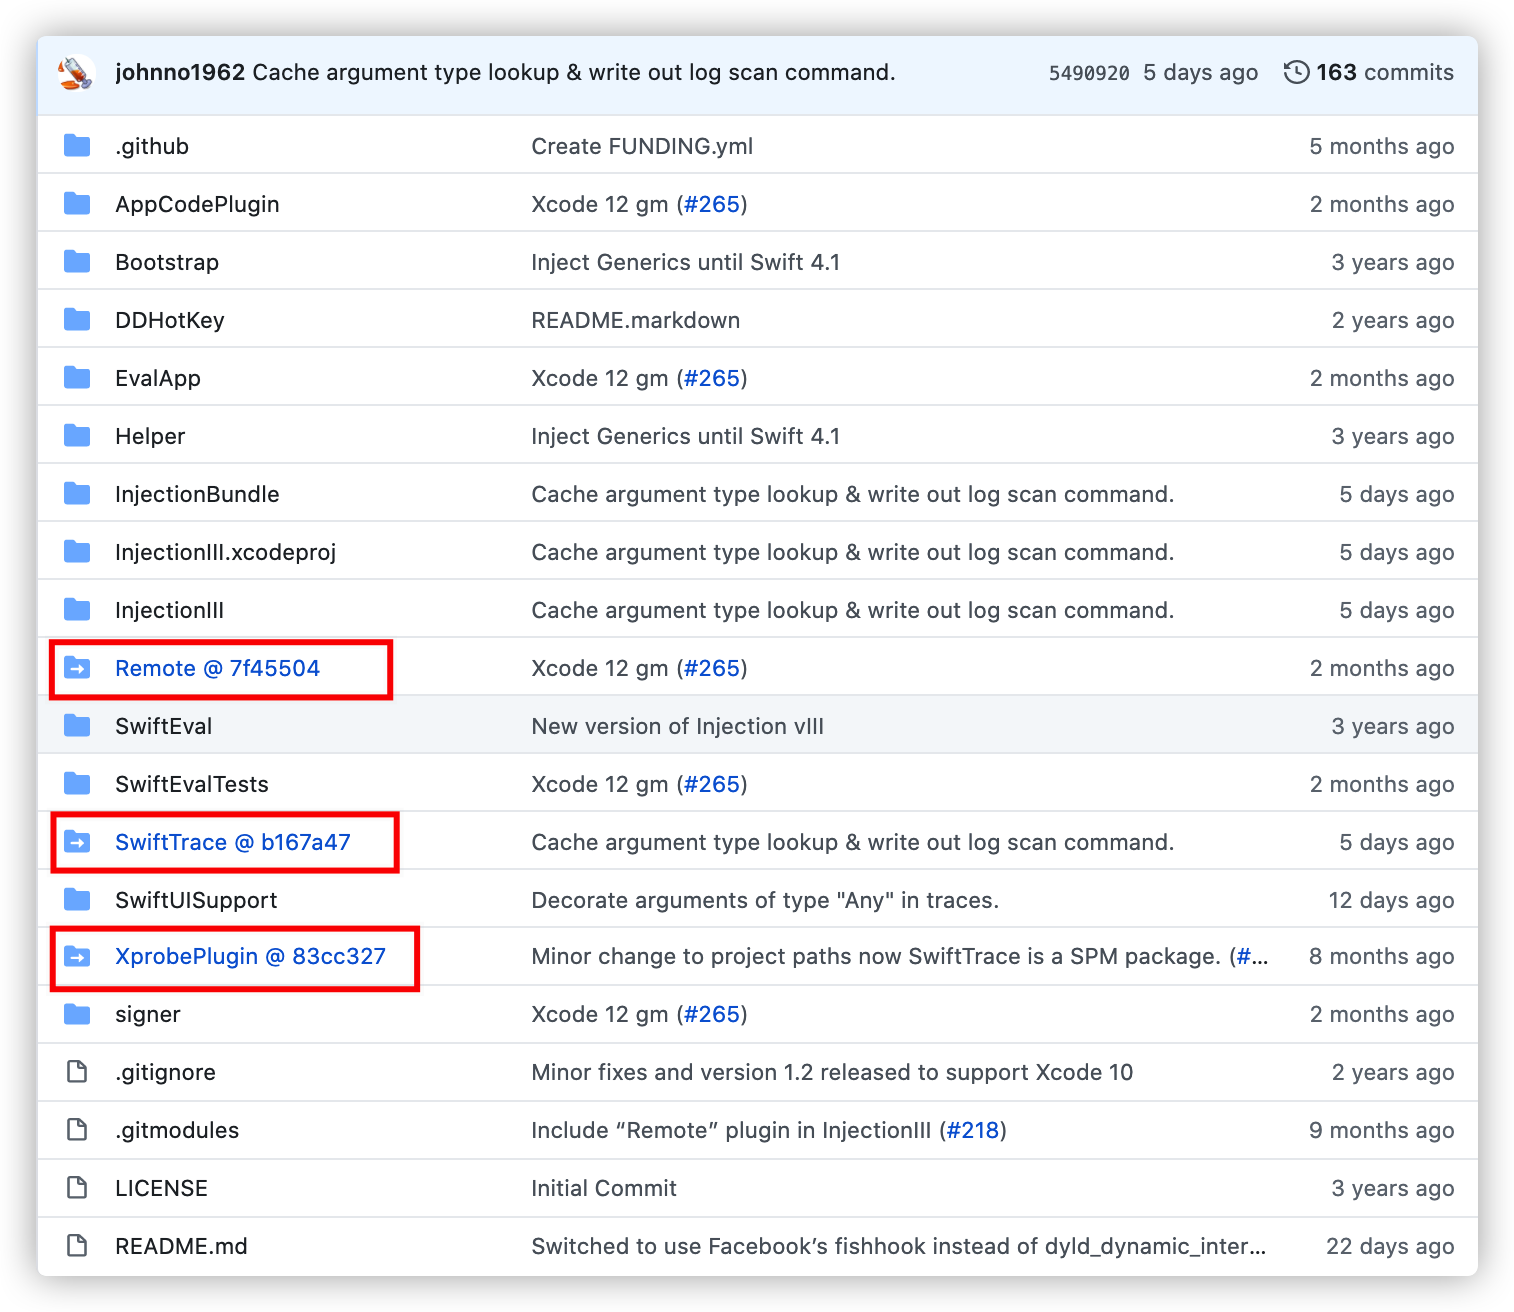
下载/clone InjectionIII 主工程代码,子工程 remote SwiftTrace XprobePlugin 也一并点进链接下载到对应目录。
然后解决下证书问题 ,直接勾选 Automatically manage signing,同时选择一下团队,注意 InjectionIII 和 InjectionBundle 两个 target 都要选择好。就可以愉快的编译了~
最后说一下,如果我们要用源码分析,当然要将源码编译起来,打断点看流程。这样的话就在 willFinishLaunchingWithOptions 里面加载的路径就要相应修改了,我这边是这样的。
1 |
|
源码分析
一、初始化Server和Client并通过Socket建立链接
Server端 即是InjectionIII工程中的Target-InjectionIII 初始化调用 SimpleSocket 的 startServer 方法并传入端口号 在后台运行开启服务端socket 服务用于和客户端的通讯,并运行 InjectionServer 类的 runInBackground 方法进行初始化操作,弹出选择项目目录对话框,如果之前选择过的话就不会弹出。
1 | + (void)startServer:(NSString *)address { |
Client端 即是InjectionIII工程中的Target-InjectionBundle 会在我们的demo工程中加载,项目启动以后可以在控制台执行 image list -o -f 查看加载的动态库,可以看到 iOSInjection.bundle 确实已经以动态库的形式加载进来了。
1 | image list -o -f |
其初始化在InjectionClient 类的 +load 方法。在 InjectionClient 类的 +load 方法里会调用其 connectTo 方法传入对应的端口号来连接服务端的 socket 服务用于通讯,并运行其runInBackground 方法进行初始化操作。
1 | + (void)load { |
InjectionIII 运行以后会在后台监听 socket 消息,每隔0.5秒检查一次是否有客户端连接过来,等我们app 启动以后加载了 iOSInjection.bundle,就会启动 client 跟 server 建立连接,然后就可以发送消息了。
二、监听文件修改
当我们在调试工程中修改了代码并保存后,FileWatcher 会立即收到文件改变的回调,FileWatcher 使用 Mac OS 上的 FSEvents 框架实现,FileWatcher 中通过 filesChanged 告诉回调方法即InjectionServer中的fileChangeHandler方法
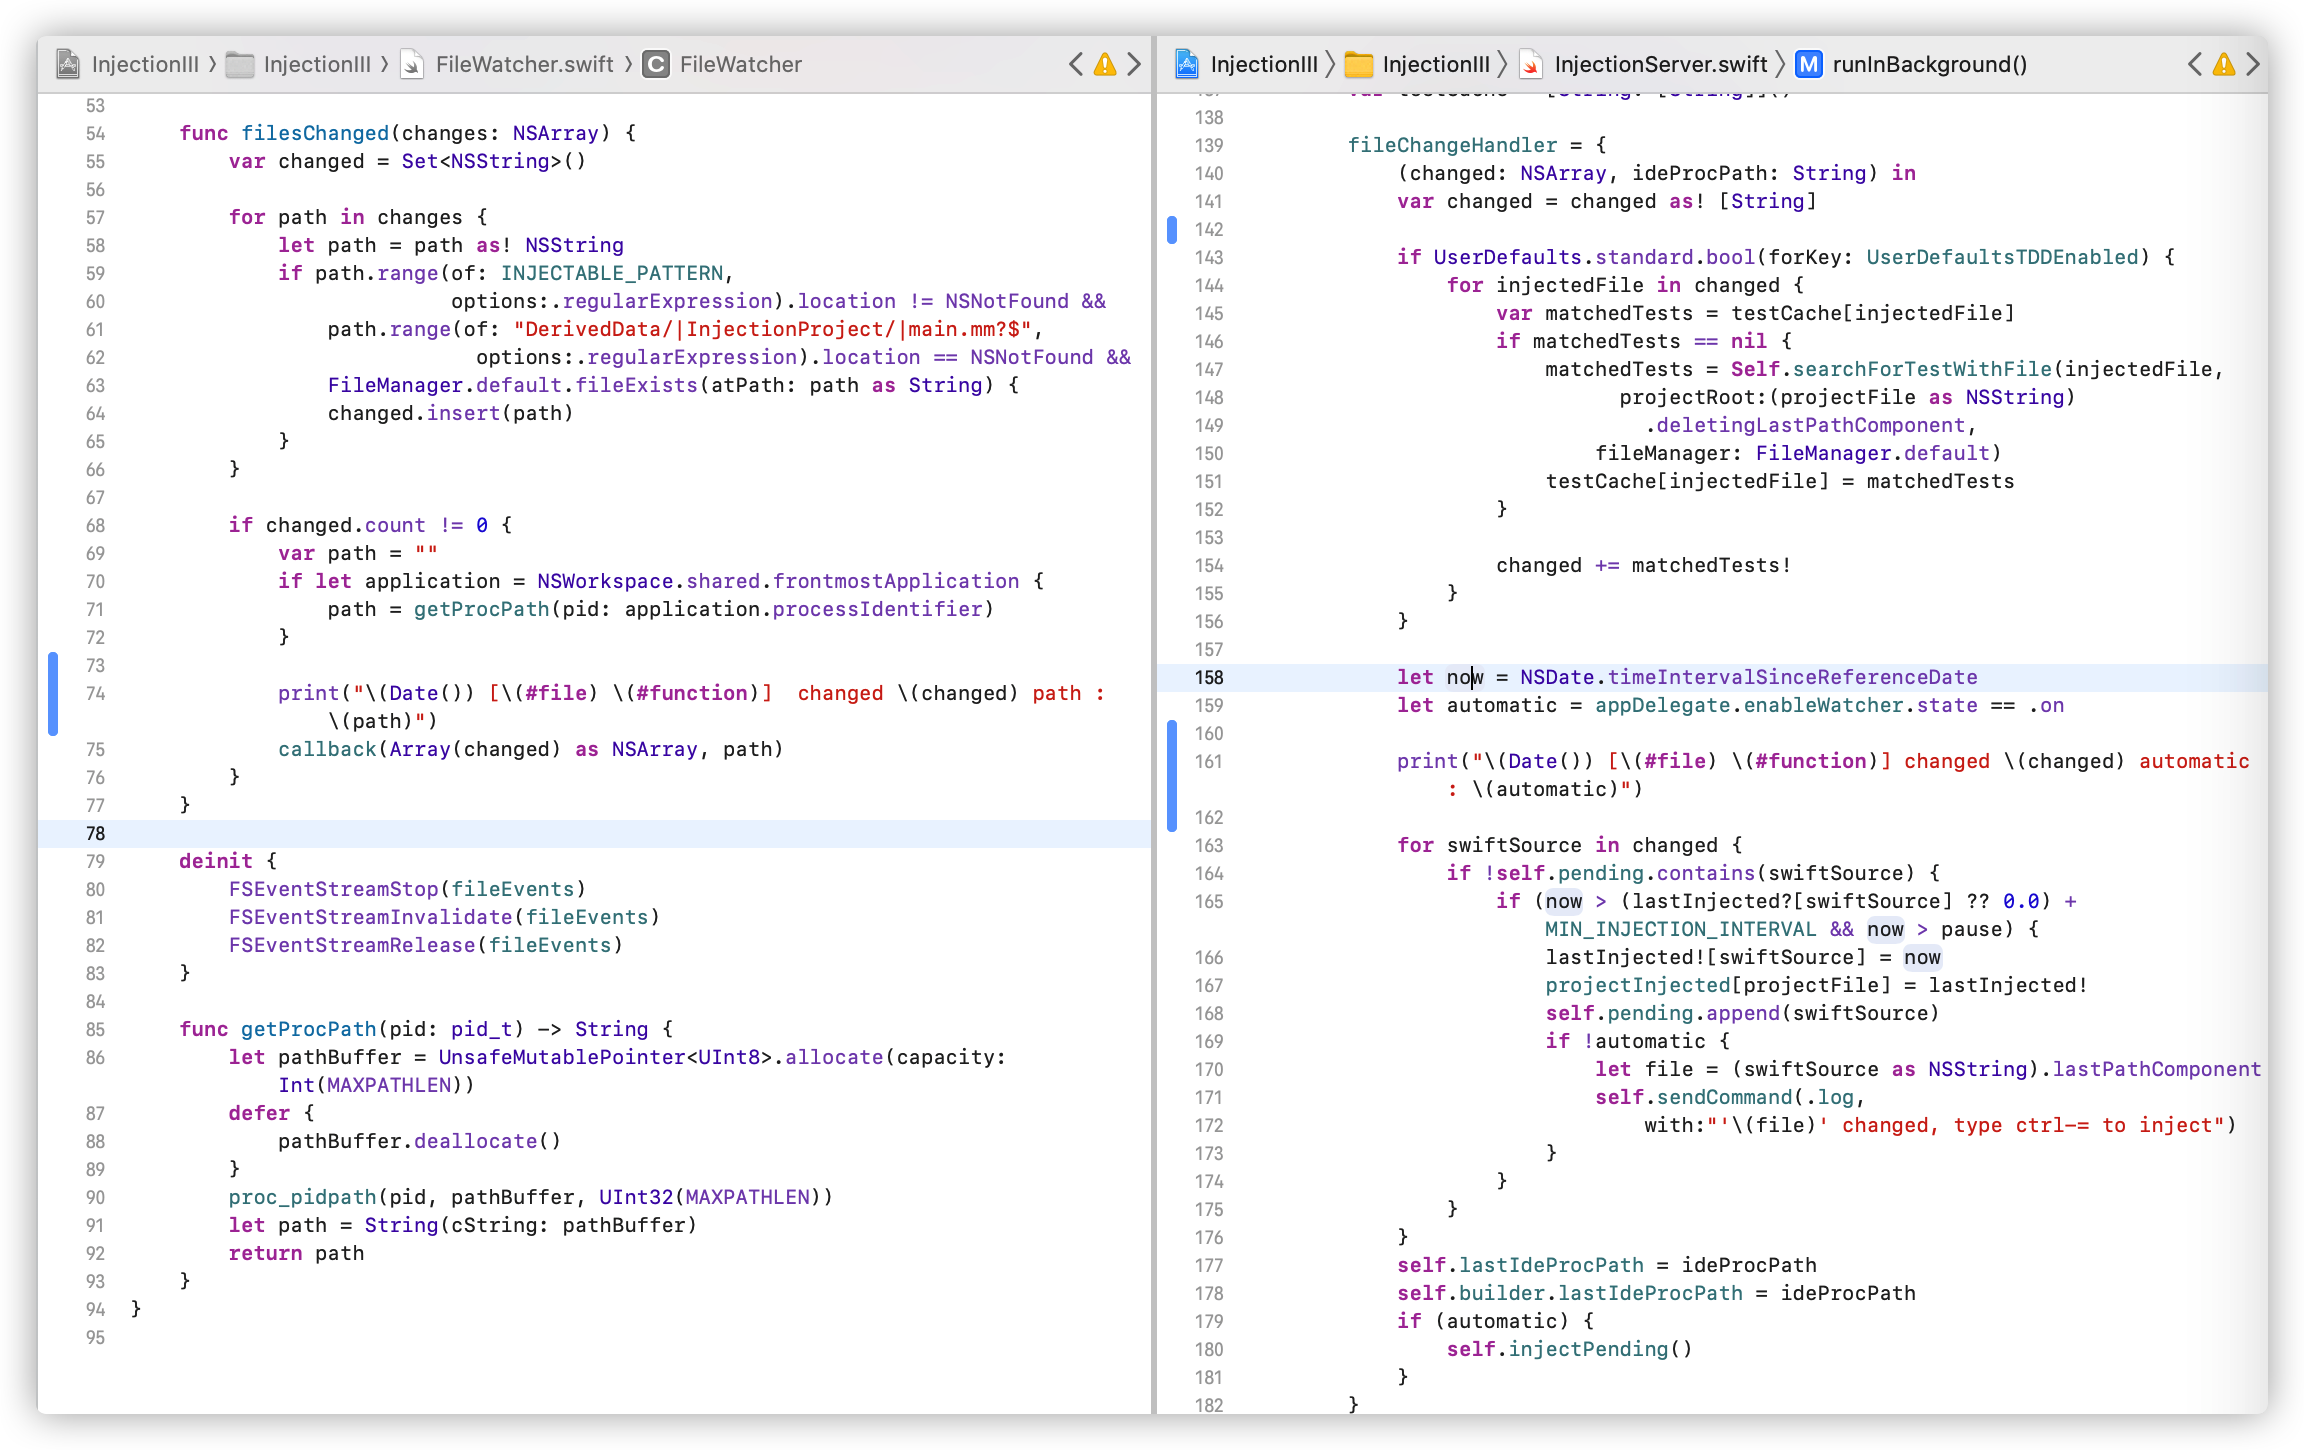
在InjectionServer方法中会判断是否为自动注入,如果是则执行 injectPending 方法,通过 socket 对客户端下发InjectionInject 代码注入命令并传入需要代码注入的文件名物理路径。如果不是自动注入那么就在控制台输出“xx文件已保存,输入ctrl-=进行注入”告诉我们手动注入的触发方式。
三、重新编译、打包动态库和签名
文件修改后若是自动注入injectPending方法会调用 recompileAndInject方法实际上会调用 SwiftEval 单例的 rebuildClass 方法来进行修改文件的重新编译、打包动态库和签名:
首先根据修改的类文件名在 Injection App 的沙盒路径生成对应的编译脚本,脚本命名为eval+数字,数字以100为基数,每次递增1。脚本生成调用方法如下图:
1 | injectionNumber += 1 |
其中 findCompileCommand 为生成 sh 脚本的具体方法,主要是针对当前修改类设置对应的编译脚本命令。由于脚本太长,这里就不贴上来了,有兴趣的同学可以自行查看。
使用改动类的编译脚本可以生成其.o文件,具体如下图:
1 | let toolchain = ((try! NSRegularExpression(pattern: "\\s*(\\S+?\\.xctoolchain)", options: [])) |
这里针对模拟器环境进行脚本配置,配置完成后使用 clang 命令把对应的.o文件生成相同名字的动态库,具体如下图:
1 | guard shell(command: """ |
过程中产生的产物如下:

苹果会对加载的动态库进行签名校验,所以下一步需要对这个动态库签名,由于签名需要使用 Xcode 环境,所以客户端是无法进行的,只能通过 socket 告诉服务端来进行操作。当服务端收到 InjectionSign 签名命令后会调用 SignerService 类的 codesignDylib 来对相应的动态库进行签名操作
1 | SignerService |
至此修改文件的重新编译、打包动态库和签名操作就全部完成了,接下来就是我们最熟悉的加载动态库进行方法替换了。
四、加载动态库进行方法替换
在生成动态库后 先使用dlopen方法把对应的动态库加载到当前运行的调试工程的进程中 并拿到返回的指针dl,然后使用dlsym拿到动态库的符号地址。
1 | @objc func loadAndInject(tmpfile: String, oldClass: AnyClass? = nil) throws -> [AnyClass] { |
如上代码所示,dlopen 会把 tmpfile 动态库文件载入运行的 App 里,返回指针 dl。回到测试工程使用 lldb image list -o -f 确实看到eval101.dylib 被加载进来
1 | [408] 0x0000000111bfe000 /var/folders/tw/nl7v5_cd577bbdzfgxjy63bw0000gn/T/com.johnholdsworth.InjectionIII/eval101.dylib |
接下来, dlsym 会得到 tmpfile 动态库的符号地址,然后就可以处理类的替换工作了。在拿到新类的符号地址后,我们把新类里所有的类方法和实例方法都替换到对应的旧类中,使用的是SwiftInjection 的 injection 方法,通过OC runtime 的class_replaceMethod把整个类的实现方法都替换了
1 | static func injection(swizzle newClass: AnyClass?, onto oldClass: AnyClass?) { |